Saturday, July 20, 2013

Headlights, Side Panel and Exhaust

The garage is being washed on Monday and Tuesday. I've got a borrowed spot on a different floor so that I can move the car during the night and get my spot washed. So, just like last year, it's move time!

Started by assembling the headlights. The lamp case had a rubber seal that had to be removed to put the dip and main lights lamp. Rubber seal back on, another seal had to come off for the standing lamp. Get the wires plugged and the wires through the hollow bolt on the casing and use the pins I'm holding on first photo to hold the lamps casing against the rim of the outer case. The rim had some groves where it slotted. Then bolt the rim to the outer case and job done. First one took me almost an hour, the second one less than 10 minutes. Experience does count!
Then, already on the garage, jacked the car up and riveted and rivnuted the underside of the panel. It went well so I could move to the next phase: grabbed the exhaust can, fitted it to the other part of the exhaust and held it all with ropes and the jack to get it in position. Drilled the plate that was on the can to attach to the car and the floor of the car. Bolted it all and it was all good. Before assembly I put exhaust assembly paste on the junctions. Then tightened the bolts on the clips that help hold the exhaust together.
This was all for the day. Jacked the car down and took the battery home to charge it. Sunday would be to try to get the car moving and do other small jobs.

Sunday, July 14, 2013

Riveting the Cut Out Panels

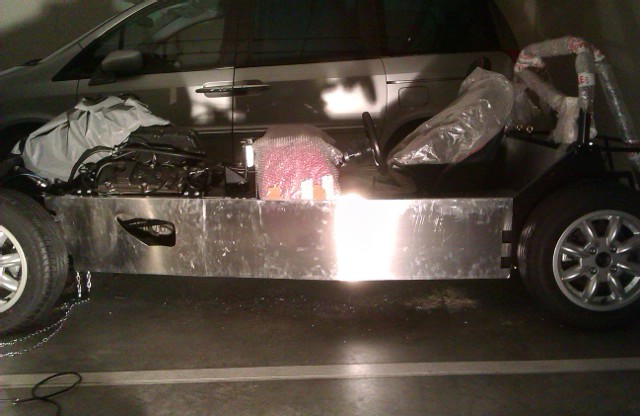
Started the session with the file and rounding out the hole for the exhaust. The panel that is going to be rivnut'ed in did not slide to position as nicely as I wanted due to some pressure from the exhaust pipes. After some time filing in, it slid perfectly. Time to drill aluminium panel and chassis, then enlarge the chassis holes and put the rivnuts in. Bolted the panel and this task was done.

Held the front panel piece in place with a clamp and drilled for the rivets. Unfortunately, the engine being there, the panel moving slightly and me not paying enough attention made this task take ages. Had to realign or enlarge holes on the panel to make them fit with the holes on the chassis. Then I had a big fight with my PU adhesive bottle. It had gone dry and I was not able to extract any from it. After some wasted time trying to unclog it, and since I believe this will be the last time I'll use it, I just cut through the bottle. With the hacksaw blade posing as a knife, spread the adhesive on the panel as if it was Nutella on bread. Riveted the upper side and held the lower with clamps, to get the adhesive to dry in place.
On the picture it is not noticeable, but the front part ended up not fitting perfectly on top, because of the drilling issue. This means I have a 2cm (almost 1 inch) gap between that panel and the one held with rivnuts. It does not look that nice. I'll have to see if I can hide that later.

Next time I'll be jacking the car up (again), riveting (and rivnuting) the underside and putting the exhaust box in. Then, headlights and some driving!

Sunday, June 30, 2013

Final (?) Driver's Side Panel Cuts and Exhaust

Based on last week's work, the goal today was to cut the frontal part of the driver's side in two pieces. One can be riveted, the other will be held with rivnuts, allowing access to the lower engine bay area. Dremmel followed by filing and emery cloth got me to the point below.
A trial fit was required to validate this last approach. Offered the exhaust to the engine and then tried fitting the panels. All seemed great. So, grabbed the Bardahl exhaust assembling paste, put some on the headers and attached them to the engine. Took some time getting it all tighten up.

Another trial fit was done to ensure once again it will work. There is a spot where I could enlarge the exhaust hole a bit to make it slide better, but it works as it is. Trial fitted the exhaust can to double-check the panel fits in and to check where the can is held to the chassis.

Next session will be riveting the panels to the chassis and then fitting the exhaust can and also attaching it to the chassis.

Sunday, June 23, 2013

More Driver's Side Panel

Shorter session on the car, all dedicated to the 1st third of the driver's side panel. Trimmed and cut extra to enlarge the exhaust hole. Mixed use of a cutting disk on the dremmel and a hand file.

Then test fitted the panel with the exhaust headers in place. Turns out that I should have mocked up this with cardboard. Now the hole was big enough but due to how the exhaust, chassis and panel are, I can't move the panel enough to remove it and gain access to the desired area.

After some thinking, seems I'll further have to cut this panel in two parts, diagonally, so that the front part is small at the top and large at the bottom and can be rivetted. The rear part will be big at the top and small at the bottom and will be rivnut'ed in place. This will allow removing just that bit and gaining access to the brake oil reservoirs and the engine's oil filter. Left that cutting for next session.

Sunday, June 16, 2013

Driver's Side Panel

I would feel bored if I was to take another session trimming the 1st third of the driver's side panel. So, and taking advantage of the fact that the neighbour that parks on my kit's left side was away, I decided to fix the rear two-thirds of the driver's panel.

After some pains doing the passenger's side and some observations I did regarding drilling, this time it went a lot easier. So easy that in a single session I applied all rivets, top and bottom! And still had time to trial-fit the front part, without the exhaust headers in place.
Next session will be to finish trimming the front (removable) panel and getting the rivnuts in.

Sunday, June 9, 2013

More Panel Trimming

Had some time to continue the work on the front section of the driver's side panel. Finished the cut for the exhaust pipe. Took the panel to the car for a test fit and it did not go as I hoped. I thought I could put the panel in without taking the exhaust headers from the engine. Unfortunately, when I slide the panel passing the exhaust headers through the hole, it hits the chassis and does not fit.

Took the headers off and then did a test fit without them. Noticed that an additional part of the lip must come out otherwise I can't fit and remove the panel using rivnuts. Anyway, to validate the hole, tried fitting the header through the hole to get it in place and I couldn't. It hit the steering column and I couldn't twist it into place.

Took the panel (and exhaust headers) back to the storage room (where I've been working the past sessions). Cut the extra bit on the lip and filed away the whole to make the curves nicer and give a bit more room on one corner. Left it there, will test fit again next time. Hopefully, will only need some small filing.

Sunday, June 2, 2013

Driver's Side Outer Panel Cutting

Today just worked with the dremmel and cutting disks. Actually also used a small electric saw for a bit, but shouldn't have...

So, first drew a line on the driver's side panel to mark where to cut. Idea is to separate the rear 2/3's from the front third. The rear gets riveted in place, the front will be held with rivnuts to allow easier access to oil filter, brake cylinders, etc.
Doing the whole straight line with the dremmel was going to take forever. So, after cutting the tips, used the electric saw. Problem is that I can't actually cut a straight line with that and it notices a bit. I filed the parts a bit to hide the small waves but it's not as good as it would have been with only the dremmel. I wonder how much it will be noticeable on the car. Anyway, in retrospect, I shouldn't have used the saw.

Offered the front part to the car to check where I had to cut the upper lip due to the engine cradle anchor points. After trimming those two spots down (just with the dremmel), moved on to the exhaust hole. Transferred the template I did last week and started cutting. This time using just the dremmel. But I did not have enough time to finish the cut. More next week...