Sunday, September 25, 2011

Throttle Peddle and Electrics

Picked up where I left last time. With my new dremmel-like tool, cut the hole previously marked on the bulkhead. That allowed me to get the throttle peddle in place. Cutting and cleaning took the best part of an hour.

Then I had to drill a hole on the peddle to get the throttle cable through. Since I don't have a pillar drill, I was a bit affraid of this task. But since the dremmel has been solving all issues I throw at him, I tried it. Tightened the peddle on the vice, on an angle to aid movement. Placed a 1mm drill bit on it and some cutting oil and started a small hole with the dremmel on slowest speed. After having a bit of a hole, swapped the drill bit for a 2mm one, that matched the cable diameter. Constantly checking that I had the drill on a perpendicular and straight position to the peddle, and putting oil once in a while, got a clean hole. Dry tested it on the cable and it was perfect!
Packed up and went home. Later on, untangled the electrical loom on the living room floor and looked at it with the wiring plans in hand. The loom (and diagram) looked a lot more frightening inside the bag than all spread out on the floor. With some masking tape, started labeling each wire, to make it easier to connect when I get the loom on the car. Only marked all the rear wires, the rest will have to be done another day.
I'll have to see about putting some black paint on the bulkhead and then attaching it to the car, with the thottle peddle on. And then cable tie the electric loom and start connecting things...

Monday, September 12, 2011

Fuel Circuit Done! (And Other Bits)

Today, being on vacation and with the kid at school, I had almost 6 hours to work on the car, interrupted only by lunch. I'll cover both work sessions on the same post as if they were one.

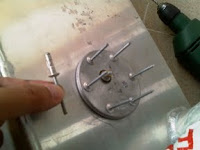
The gas tank was ready to go on the car and that was my first task. Placed the fuel sender on the previously drilled hole and then applied 6 rivets to hold it in place. Did not put the recently acquired Nural stuff on it since, after reading the small letters, it should be used in replacement of rubber seals; the sender had a rubber seal.

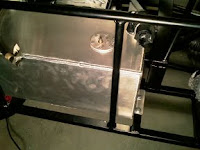
Once in the car, marked the drilling spots and drilled tank supports and chassis. When I grabbed the bolts and washers, noticed the washers were quite large and two of the drilled holes were too close to the tank wall for the washers, so I re-drilled and bolted the tank down.

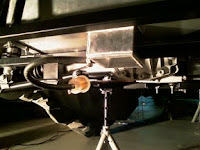
Spent some time cleaning the floor of all the ally and steel bits from that drilling session (and previous ones) with a broom. After that I attached the rubber pipe from the tank to the copper pipe that runs along the car. I had to lay on the floor, hence the time previously spent cleaning... After taking the picture I tied the pipe to the chassis with a plastic strap, to be more certain it will not run on the road. (EDIT: 2012/09/29 - I should have cut 12cm of pipe from what was provided because it was too much and later on I needed that to close of the tank)
After lunch break, grabbed my Haynes CBR manual and looked where I should attach the throttle cable. It said I should take the carbs off the engine head, but that was a task I didn't look forward too. After 30m fiddling with tools and cable on a (very) tight space, I managed to hook the cable in place without taking the carbs off! Very happy with that. To close the fuel circuit, attached the tubes that leave the fuel pump to the copper line and to the carbs intake. Again, it helped to have the Haynes manual. It was also very helpful to have all tubes labeled by Steve from Aries. As usual, great job of him that made my life easier! Tied the pump to the chassis with a couple of cable ties and the job was done.
Next I grabbed the nosecone, scuttle and engine cover and trial fitted it all. First the cone and scuttle, holding it to the chassis with masking tape, to avoid more damage as I did previously. Then the engine cover, which required moving the scuttle a bit. This allowed me to mark the definitive place where the bulkhead will sit. It also gave me the chance to take the great picture bellow! Marked the correct location for the bulkhead so that I could remove it for further cutting.
Stored away the fiberglass parts and spent a load of time marking on the bulkhead where to cut to be able to put the throttle peddle. Closed the day with the bulkhead marked but uncut. More dremmel action soon!

Sunday, September 11, 2011

More Dremmel Cutting on the Bulkhead

Last time I had left the trimming of the bulkhead unfinished. Today I went to the storage room to fetch some boxes (unrelated to the car) and I saw the bulkhead on the table, the tools ready to be used... Although it was over 23h00, I couldn't resist the urge, plugged the tool and finished the trimming job. It took me around 45 minutes to finish the trimming and enlarge the hole I previously made for the steering column.
No pictures, but a small task out of my way in order to move forward with the bigger (and more visible) tasks.

Friday, September 2, 2011

Refrigeration Circuit Done! And Other Bits...

Went to the car with the radiator, nosecone and refrigeration fan. Clamped the radiator to the chassis, trial fitted the nosecone and fine-tuned it's position. Removed nosecone and confirmed that I can attach the fan on the chassis later, without removing the radiator. Steve said I could brace the fan to the chassis, although there is a gap, refrigeration works well. Since Portugal has around 10º/15º more on the summer than the UK, I'm still unsure if I'll attach it that way or in a different one. Anyway, since that will be later...

With the radiator clamped, it was impossible to mark it for drilling, since the clamps were over the drilling areas. But the radiator is such a tight fix inside the cone that I was unsure how to do it. Ended up solving the issue the following way... With the radiator clamped, checked there in the chassis supports I should drill for best fit (offset to the interior on the upper ones and offset to the exterior on the lower ones). Removed the radiator and drilled the chassis. Then placed some paper masking tape on the radiator and clamped it on top. Fit the nosecone to ensure positioning. From behind, used a pencil to mark the radiator where to drill, putting the pencil through the holes in the chassis supports. Remove nosecone and radiator, drill, place masking tape on the top area, fit radiator (with bolts on the lower supports), fix nosecone, mark from behind the top holes on the masking tape. Remove cone and radiator, drill, attach radiator with the 4 bolts and nuts, trial fit nosecone to ensure success.
Having the radiator in place, attached the remaining hoses to it. One of them had to be cut to insert the therm sensor housing case. After taking the picture bellow, covered the casing hole with some masking tape, since I didn't have the sensor with me. With this, the refrigeration circuit is done!
Last task that I started was to trim the bulkhead, since it has a bit of excessive ally on the lip that prevents the hood to be correctly placed on top of the scuttle. Cutting ally with the dremmel is very time consuming and I had other things to do, so had to leave the job incomplete.
All the above tasks, including some cleaning up of the area around the car, took me around 3h and a half.

Thursday, September 1, 2011

More Work on the Fuel Tank

After two weeks away at the beach with the family, came back and had some car time. Spent the evening around the fuel tank. A couple of weeks ago I had to buy fixings for the sender on the tank. Ended up buying big enough rivets, after looking for rivnuts but not finding adequate ones. Also bought a squirt of Pattex Nural 61 to use around the sender.

Using the sensor, marked the 6 holes to drill on the tank. The box of rivets came with an HSS drillbit of the correct size (4.9Ø). Then drilled the holes and trial-fitted the sender.
After that, the only thing needed before fixing the sender was to clean the tank. For that, I had bought a jar with 5 liters of petrol. First closed all the holes except the sender one with parts of a plastic bag and rubber bands. Cutting a long story short, rubber bands break with petrol, had to redo the closings with string. Did the washing on the bathtub, scratched it when hitting it with the tank. Placed the rubber mat on the tub's floor to prevent more scratching and the mat is now all wrinkled because the petrol attacked it (wife happy because she wanted a new mat for that bathroom and now has the perfect excuse).
Drained the tank as best as I could I left it to dry. When dry, I'll be able to fit the sender and put the tank on the car. What seems an easy task took me, including the time to clean up the balcony and the bathtub, almost 3 hours.