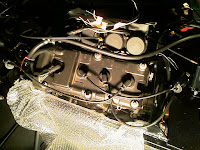
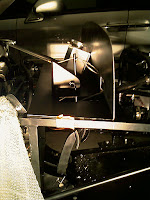
Had today as vacation (tomorrow is a national holiday) and restarted with the ancillaries. Using plastic straps, tied the ignition control unit (through the rubber braces it has on it's casing) on the chassis. Then plugged the wires, that had all been labeled by Steve from Aries. Also plugged the specific ones to the coil packs.
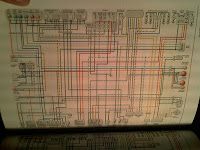
Next, placed the rectifier roughly around where it will lay and plugged the other cable that came on the ancillaries box. That cable wasn't labeled but most of the wires are easy to tell, specially with the help of the Haynes Manual wiring diagram. So, the rectifier cable was connected to the alternator and to the positive cable that attaches to the battery, with the fuse box in between. Bellow is, besides the part picture, also one of the diagram.
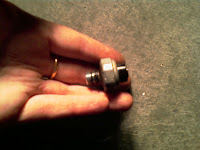
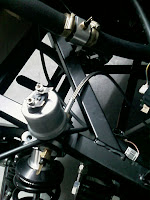
One of the gauges missing was the oil pressure sender. First I had to remove from the engine the old pressure switch. Then connected in it's place the braided hose that came on the Digidash box. Pictures show where the braided hose connects to and the looks of the removed pressure switch. On the end of the braided hose there was a casing with two tappered holes, one for the oil pressure sender and another for the oil temperature sender. The third picture shows that and also the water temp sender on it's casing, on the radiator pipe.
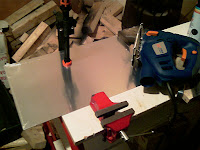
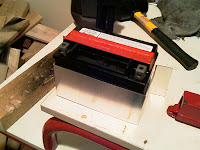
The battery needs some secure way of being held to the car. I've bought a small sheet of ally and the last task of the day was to make some straps. Only one got finished and both will still have to be painted black, but it seems I'll be able to make this one work too. The job at hand was split in two phases: first clamp the sheet down to cut it with the small electrical saw. Then, using a piece of wood and the rubber mallet, bend the metal cuttings to wrap around the battery.
Next time, tasks will be to bolt (or rivet) down the ancillaries, senders and the horn. Also to bolt down the radiator fan. Then will have to crimp cables...
I must take this chance to thank Iain and David for having given me access to their build pictures. They have helped me much and at the current build stage there was lots of information I got through your pictures!
Build diary for my first kit car: an Aries Locoblade (http://www.ariesmotorsport.com/) that I will be building in Portugal for the next months (or years).
Monday, October 31, 2011
Friday, October 28, 2011
Electrics - Coil Packs
Had some time off work and spent a bit on the car. Took the decision to install first all the engine ancillaries and only after that work on crimping electrical connections to the wires and attach them. It seemed the easiest task to start with the coil packs and the HT leads.
Using the Haynes Manual for the CBR900RR as a helper, figured out (after one hour of reading) which coil pack controlled each "pair" of sparks. Each coil pack had scribbled the colour of the wires for each connection. Matching those colours with the wiring diagram, figured which one was for the #1 and #4 cylinders and which one was for the #2 and #3.
Still looked around where to put the ignition control and regulator but ended up packing for the day.
Wednesday, October 19, 2011
Continuing on Electrics
After spending the weekend at work, today I had the day off as compensation (although having to be reachable). So I got to spend a bit of time on the car.
Just finished laying down the electrical loom and hold it in place with plastic straps. Also looked into the battery, to get it's size, since I need to make/buy some brackets or another way to hold it in place. Found out it's very tiny and the acid is all outside for me to fill it when I get around to use it. Took the engine ancillaries with me but didn't get to lay them on the car; that will have to be done another day.
I'm stalling a bit, it's something daunting to me. I also have to figure out what I need to buy, in terms of plugs and connectors. I'll probably only have the electrics done by the end of November, at this pace. I still hope to get a second compensation day next week, that might help speed up things a bit.
Saturday, October 8, 2011
Header Tank Fixed
Only had an hour and a half, but got a task done. Drilled the holes on the header tank and then on the bulkhead to hold it. This time, to avoid a wrong selection of drill bit sizes, I used the one of the washers to take the measure for the right drill bit (6mmØ).
It would had been easier if I had drilled the holes on the header tank prior to attaching the stiff tubes on it...
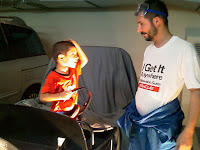
The kid was around when I was packing up and taking the picture for the blog and wanted his car to appear. Oddly enough, it's not one from "Cars" movies!
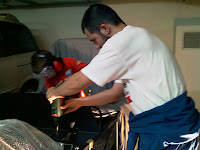
Before packing, I still had time to start laying out the electrical loom on the car. I have spent a couple of nights with the loom all spread out, labeling each wire. Now was the time to get it on the car. It is not all in, but that will be continued. The idea is first to just use plastic straps and later on use the riveted p-clips, when the location is final.
Feeling a childish urge to fit the battery, the steering wheel, the horn, wire it all up and start honking...
Sunday, October 2, 2011
Throttle Peddle in Place!
Did not have much time and spent it all around the throttle peddle and the bulkhead. Drilled the peddle for the cable to hold on (forgot about that last session). Then marked on the peddle where I should drill for the bolts and drilled that. Lost a bit of extra time since I still can't figure out the drill bit diameter by looking at the bolt. So drilled the 4 holes with the 3,5Ømm, then enlarged with the 4,75Ø and ended up enlarging again with the 6Ø for the correct size...
Having the peddle drilled, placed the bulkhead on the car and fixed it with masking tape. Marked using the peddle holes where to drill there. It was all positioned in a way that ensured two of the wholes would be on a chassis bar, to stiffen the peddle attachment. After marking, when I was about to drill, the wife and kid arrived from the playground. He wanted to help me using my gear. After properly geared, he pressed the driller trigger while I held it in place. He drilled the 4 holes (except the final bit on the two that went through the chassis, when the drill bit sometimes gets stuck).
He then left and I just had to bolt it all up and connect the cable. I then sat on the car pressing the peddles and testing it all. It really is a tight squeeze on the peddle area, specially because I like chunky footwear. I will probably have to buy some "All-Stars" or karting boots to drive the car. And really considering a trick on the footwell suggested by a cousin, to give me a couple more centimeters. I might also have to make a new hole for the cable a bit lower. Since the current one is too high, the peddle is sensitive (travels half the distance that my tin-top one travels)...
As visible on the pictures, I spent a bit of time during the week spray painting the bulkhead black. It's far from perfect, but looks a bit nicer than raw ally.
IMPORTANT NOTE TO RHD builders: I can have the throttle peddle in that position because the right side has the 2 holes on the chassis tube that makes the top of the tunnel. RHD builders must position the peddle as further back as needed to be able to bolt the two back holes to the horizontal chassis tube, since there is no outer tube available to bolt the any of the sides to. Failing to bolt two holes to the chassis will make the bulkhead ally flex every time the peddle is pressed.
Subscribe to:
Posts (Atom)


