Took a vacation day and spent some hours on the car. Main task was to work the rear fibreglass part.
Spent some hours trimming it to fit correctly on the car. Had to trim near the rollbar stays, to clear the shocks behind the wheels and for the tow hook to clear on the rear. It was time consuming so that it would look well, but it was worth it.
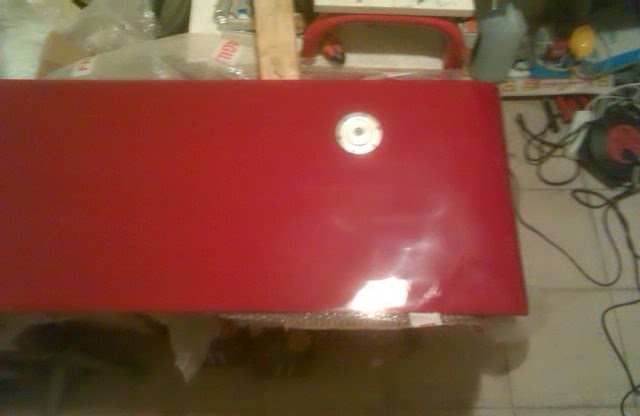
Then I marked where the fuel filled should go. Using the cork seal of the filler cap as template, marked the rear to be drilled. Using the circular cutting adapter on the drill, cut the circle. Since the tool is not precise, I left a bit of a margin. Spent some extra time with the sanding head on the dremmel triming it so that the filler cap would fit the hole. The final result is on the pictures below.
Then I looked into the other two things that must go on that part: fog light and license plate light. Regarding the fog light, this must be on the road side of the car. That means on the left side in Portugal but on the right side in the UK. Since I want to get the car road-legal in the UK, I need to comply with those rules. But I want to drive the car here with safety. I was wondering what to do and ended up sending an email to Steve at Aries. He replied saying the light had to be on the centre or the right but advising for me to put it on the right and later move it to the left and put the reversing light (that the car was not going to have) on the right, using the same holes. This sounds like a great idea, so it's what I'll be doing next time.
Build diary for my first kit car: an Aries Locoblade (http://www.ariesmotorsport.com/) that I will be building in Portugal for the next months (or years).
Friday, May 2, 2014
Sunday, April 20, 2014
Front Wings Wiring
Worked on the car a bit this morning. Main job was to cut wires, crimp them and use plastic ties to hold them. All for the indicators on the front wheel wings. Had to trial fit the wings and was happy with the result. Now the wires are in place and all is ready for the wings to be mounted. This took me an unexpected hour and a half!
Also cleaned the connections from the loom to the battery. One was showing some green stuff (like when 1,5v batteries drip their contents). This because last week I tried to make the car run but it failed. Probably was because the battery was not topped. Anyway, today, after checking the terminals and with a freshly charged battery, the car worked. Just had it for a while on neutral revving and then shut it down. The new gear knob makes it a lot easier to find the neutral!
The reason I haven't fixed the wings yet is because I'm missing the polyurethane for the extra fixing. Looked for Sikaflex or Tiger Seal around and, although there is a Sika branch in Portugal, I was unable to find it. Or a proper replacement. Ended up ordering Sikaflex 221 from the UK through eBay, due to arrive later this week or the next.
Also cleaned the connections from the loom to the battery. One was showing some green stuff (like when 1,5v batteries drip their contents). This because last week I tried to make the car run but it failed. Probably was because the battery was not topped. Anyway, today, after checking the terminals and with a freshly charged battery, the car worked. Just had it for a while on neutral revving and then shut it down. The new gear knob makes it a lot easier to find the neutral!
The reason I haven't fixed the wings yet is because I'm missing the polyurethane for the extra fixing. Looked for Sikaflex or Tiger Seal around and, although there is a Sika branch in Portugal, I was unable to find it. Or a proper replacement. Ended up ordering Sikaflex 221 from the UK through eBay, due to arrive later this week or the next.
Sunday, April 13, 2014
Gear Lever Knob
Didn't work on the car today. But went there to check what stuff I needed to buy to finish off the wiring on the front wings.
Also took the chance to fit a gear lever knob that I bought on the cheap. It looks OK and it makes using the gear shift a lot easier. The original stick is small and the handbrake makes it harder to grab it. With the knob, it is easier to grab and shift. Took me 10m to fit.
Designed on the Netherlands, made in China. Fake carbon and aluminium.
Also took the chance to fit a gear lever knob that I bought on the cheap. It looks OK and it makes using the gear shift a lot easier. The original stick is small and the handbrake makes it harder to grab it. With the knob, it is easier to grab and shift. Took me 10m to fit.
Designed on the Netherlands, made in China. Fake carbon and aluminium.
Sunday, April 6, 2014
Front Wings Ready to Go!
Had some time on the car today. My idea was to trim the fron wings so that the wheels could be removed without clashing. But decided this didn't make much sense so I grabbed a pipe and a huge wrench and re-bent the wing stays to give more clearance. Then placed the wings on them and drilled them with the 3,5mm drillbit, marking the stays for further drilling.
Then, using a bit of rope and a wrench as weight, marked a vertical passing through the centre of the wheel and drilled the wing laterally for the indicator light.
Removed the wings and enlarged the holes on the stays with the 6mm.
Back on the storage room, enlarged the holes to 6mm. Since they will get the doomed-head bolts with the square section, as the nosecone, had to work with the file to make the holes square.
On the side holes, used the 12mm drillbit to further enlarge the hole. Then used the small diameter sanding head on the dremmel to make the hole bigger. Switched to the large diameter sanding head and after a bit more sanding, the rubbers fit correctly. Then inserted the indicators on the rubbers.
Just need to get some PU adhesive (the one I have is now dry) and add wires from the indicators to the engine bay and I can put the front wings in place.
After all this, filled the tank with 10L of gas and mounted the battery (that was charged 3 weeks ago) to try to get the car for a spin inside the parking space. Unfortunately, the battery was reading 11,5v when I tried starting the engine for the first time. It did not had enough juice to get the car going. Next time I try, I'll have to try on the day I charge the battery.
Still managed to see that I wired the indicator stalk on the steering column incorrectly. It blinks the right side when it should blink the left and vice-versa (of the nosecone indicators, the only ones already in).
It was odd that, when I removed the battery after trying to start the car, both positive and negative bolts were very hot. I never noticed this before. I wonder if I have a short or something and that is why it failed to start today.
Then, using a bit of rope and a wrench as weight, marked a vertical passing through the centre of the wheel and drilled the wing laterally for the indicator light.
Removed the wings and enlarged the holes on the stays with the 6mm.
Back on the storage room, enlarged the holes to 6mm. Since they will get the doomed-head bolts with the square section, as the nosecone, had to work with the file to make the holes square.
On the side holes, used the 12mm drillbit to further enlarge the hole. Then used the small diameter sanding head on the dremmel to make the hole bigger. Switched to the large diameter sanding head and after a bit more sanding, the rubbers fit correctly. Then inserted the indicators on the rubbers.
Just need to get some PU adhesive (the one I have is now dry) and add wires from the indicators to the engine bay and I can put the front wings in place.
After all this, filled the tank with 10L of gas and mounted the battery (that was charged 3 weeks ago) to try to get the car for a spin inside the parking space. Unfortunately, the battery was reading 11,5v when I tried starting the engine for the first time. It did not had enough juice to get the car going. Next time I try, I'll have to try on the day I charge the battery.
Still managed to see that I wired the indicator stalk on the steering column incorrectly. It blinks the right side when it should blink the left and vice-versa (of the nosecone indicators, the only ones already in).
It was odd that, when I removed the battery after trying to start the car, both positive and negative bolts were very hot. I never noticed this before. I wonder if I have a short or something and that is why it failed to start today.
Saturday, March 15, 2014
Hood Fixed and Start on Front Wings
This weekend managed 3 hours Saturday instead of the usual Sunday morning. Spent them on two major tasks.
First I made a paper template of the holes for the hood's rubber straps. Then I went on the car, juggled a bit the hood to be sure it was in place and marked one corner, using paper tape glued over and the template to draw dots on the tape. Drilling (3,5mm) and riveting and it was done.
Then I moved to the front wheel wings. Did some fine-tuning on the stays and then tried to mark where to drill for the bolts but decided I first should trim the sides of the wings. I either bended the stays too near the tires or they really need trimming otherwise the wheels can't come out without hitting the wings. Also marked where to drill for the side lights. After marking, packed and went home.
First I made a paper template of the holes for the hood's rubber straps. Then I went on the car, juggled a bit the hood to be sure it was in place and marked one corner, using paper tape glued over and the template to draw dots on the tape. Drilling (3,5mm) and riveting and it was done.
Then I moved to the front wheel wings. Did some fine-tuning on the stays and then tried to mark where to drill for the bolts but decided I first should trim the sides of the wings. I either bended the stays too near the tires or they really need trimming otherwise the wheels can't come out without hitting the wings. Also marked where to drill for the side lights. After marking, packed and went home.
Sunday, March 9, 2014
Scuttle and Bulkhead
A couple more jobs done today.
Had to fix again the terminals on the wires for the oil pressure. One was pulled like if someone had given a pull on the wire. When I was working on it, since both wires were ties together, I pulled the other one...
Then, held the scuttle in place and drilled through the bulkhead and scuttle to hold the two pieces together. Released the scuttle to enlarge the holes and insert rivnuts. After that, got it in place and held it down on the chassis and the bulkhead to it. Since this part was done, attached the dash back to the bulkhead. The car is drivable once again!
Then I moved into understanding how the rubber straps that hold the hood on the car have to be installed. Was interrupted by a visiting neighbour. Since I had promised to take the kid to the movies after lunch, packed it all up after the neighbour was gone. Just spent 5 minutes on the storage room testing the strap with two pieces of wood. I understood the logic, just need to make a template with the distance between holes and then drill the chassis and hood. But it will have to be next week.
Had to fix again the terminals on the wires for the oil pressure. One was pulled like if someone had given a pull on the wire. When I was working on it, since both wires were ties together, I pulled the other one...
Then, held the scuttle in place and drilled through the bulkhead and scuttle to hold the two pieces together. Released the scuttle to enlarge the holes and insert rivnuts. After that, got it in place and held it down on the chassis and the bulkhead to it. Since this part was done, attached the dash back to the bulkhead. The car is drivable once again!
Then I moved into understanding how the rubber straps that hold the hood on the car have to be installed. Was interrupted by a visiting neighbour. Since I had promised to take the kid to the movies after lunch, packed it all up after the neighbour was gone. Just spent 5 minutes on the storage room testing the strap with two pieces of wood. I understood the logic, just need to make a template with the distance between holes and then drill the chassis and hood. But it will have to be next week.
Sunday, March 2, 2014
Small Things Under the Hood
Finally a morning working on the car!
Sorted the wiring on the dash. After reading my previous post, colleague builder Iain sent me a message saying that his car has a dangling purple wire on the digidash side. Armed with that, I confirmed that the other dangling was a match with the sole one from the loom and the dash is fully wired! THANK YOU, Iain! Can't thank you enough for these helps you give me!
Then I cut two lengths of wire to extend from the loom to where I'll have the brake oil pressure sensors (lids of the master cylinders). My current cylinder caps don't have sensors but I'll eventually get around to get some replacements, so the wire will be needed. And since I was messing with wires...
Third task was to make sure I had hood and scuttle on their final position. Still had to sand a bit the hood near the airbox to get a perfect fit. When I was happy with it, marked the chassis rails through the scuttle and then removed the parts and drilled.
Final task was to get the bulkhead in position and drill a few holes through it into the chassis to hold it down. It was until now in place only with the two bolts that hold the accelerator peddle to the chassis. Removed the bulkhead, enlarged the holes on the chassis and inserted rivnuts. Bulkhead back in and fixed down with bolts through the rivnuts.
Had to call it a day. Very happy with what I did, got rid of lots of small things. Next is fixing the bulkhead to the scuttle, the scuttle to the chassis and dash back at the scuttle. Then clamps for the hood.
Sorted the wiring on the dash. After reading my previous post, colleague builder Iain sent me a message saying that his car has a dangling purple wire on the digidash side. Armed with that, I confirmed that the other dangling was a match with the sole one from the loom and the dash is fully wired! THANK YOU, Iain! Can't thank you enough for these helps you give me!
Then I cut two lengths of wire to extend from the loom to where I'll have the brake oil pressure sensors (lids of the master cylinders). My current cylinder caps don't have sensors but I'll eventually get around to get some replacements, so the wire will be needed. And since I was messing with wires...
Third task was to make sure I had hood and scuttle on their final position. Still had to sand a bit the hood near the airbox to get a perfect fit. When I was happy with it, marked the chassis rails through the scuttle and then removed the parts and drilled.
Final task was to get the bulkhead in position and drill a few holes through it into the chassis to hold it down. It was until now in place only with the two bolts that hold the accelerator peddle to the chassis. Removed the bulkhead, enlarged the holes on the chassis and inserted rivnuts. Bulkhead back in and fixed down with bolts through the rivnuts.
Had to call it a day. Very happy with what I did, got rid of lots of small things. Next is fixing the bulkhead to the scuttle, the scuttle to the chassis and dash back at the scuttle. Then clamps for the hood.
Subscribe to:
Posts (Atom)


