Saturday, February 26, 2011

Driveshafts and Visitors

Today I left the house carrying a trolley full of tools and parts plus the driller's case under the arm. I hopped to have everything I could need for the session.

First task was to bolt the front diff support to the chassis. Couldn't do it alone, need someone else to hold the bolt in place... Then looked into the bolts that hold the prop on the diff. Don't have an Allen key big enough for them... It will have to wait until I go shopping again.

Moved to the rear. Before drilling holes to bolt the upper diff support on the chassis, I want to have the driveshafts in place, to be sure where the diff needs to sit. Opened the CV boot box and looked into it: the rubber boot, two straps and a CV grease packet. Seemed easy enough.

Turned the CV inside out, slid it into place, applied the 1st strap, repeat on the other side. Then slide the shaft inside one of the CV joints (Steve from Aries sent them already with bearings inside and greased) and put the circlip on the tip of the shaft, to keep it in place. Steve had packed all four circlips in a small bag, tapped to one of the shafts; can't miss it, it's a great help! The circlips didn't have small holes on the tip and seemed to stay stretched after putting them around the shaft. I'm not sure if I got it right, although it looked like it was. Again, repeat on the other side.


On the first shaft, I filled the CV boots with grease and had a really hard time pulling them over the joints. For the second shaft I used a different and easier method. I turned the boot inside out, filled the cup of the joint and then pulled the boot over it. It was easier and cleaner too!
Having it done, it was just a matter of offering it to the diff and upright and bolting it by hand first. Fortunately had an Allen key big enough for those bolts (it was my biggest one). Repeated it all for the other shaft. And now I have propulsion from the engine until the flanges!


On a side note, I had several visitors on the four hours I spent working on the car. Including the wife and kid. Summing all visits, I believe I did not work for around half-hour. One of the visitors was the father of a neighbor, in his 60s. "Oh, your doing a Super Seven!" It was the first time someone actually knew what I am building! And he new about Caterham, about kitcars... I was amazed!

Another visitor scared me a bit. I was facing the wall, fighting the shaft on the joint and the circlip... My back to the garage. Out of nowhere, a man with deep voice greets me. I look over my shoulder and see two police men looking at me. Ends up a neighbor called the station because she saw a strange man going inside the garage and, since we have had 3 robberies in less than two weeks, they came around patrolling inside the garage. What worries me the most is that if the cops managed to sneak on my back and scare me, a robber could sneak and whack me with my big wrench I had left inside the kit... Maybe I should work facing the garage, with my back against the wall. Cornered but aware... ;)

Next time... Drilling holes for diff support, tightening all rear suspension and arms bolts, fitting rear brakes...

Thursday, February 24, 2011

More on the Prop Shaft

Spent my "car time" on the weekend moving parts and tools out of my storage room on the parking area to a room in the house. All because some robbers have been hitting the building storage rooms and I don't want to have missing or damaged parts.

So, tonight I went for a bit of car fun, to compensate. Problem is that, since I have to take all tools and materials that I believe will be needed, I ended up forgetting two tools, so I couldn't really finish what I wanted.

Started by bolting down the front of the diff support to the car. Ends up I need two spanners for that and had only taken one... Moved to the second (bigger) prop shaft. Recalling what I learnt almost two weeks ago, I got it done easier, although it still took me the best of 40m to do the four bolts there. Then I moved to the other side of the shaft, that bolts on the diff. And, again, I forgot the type of tool to do those bolts, so they got just temporarily done by hand.
On the weekend, after tightening the bolts that got just half done today, I'll drill the holes to bolt the rear diff support to the chassis and then work on the half-shafts that link the diff to the rear wheels.

Sunday, February 13, 2011

Prop Shaft and Tricks of the Trade

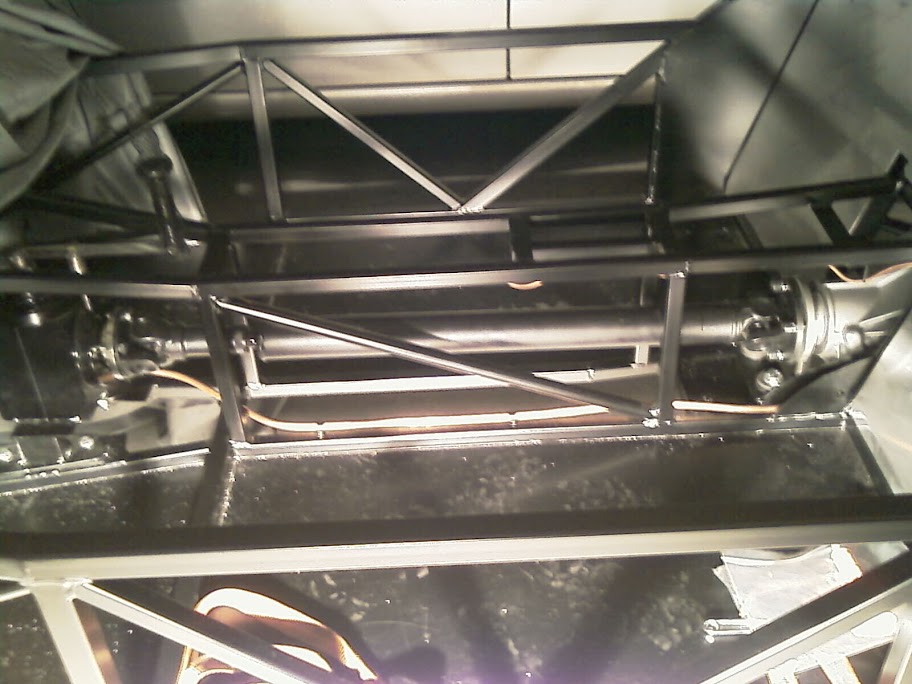
After getting my prop shafts greased on a repair shop, I could finally get them on the car and move on with the rear axle and, actually, all propulsion.

Started the session with help from the wife to tie the prop shafts loosely on their locations and then to get the diff in place. I had tried before to put the diff on the car alone. I couldn't make it. But two people did it easily.
After that, I spent two hours trying to bolt the smaller prop shaft on to the engine and the MNR reverse box. And this is where tricks of the trade are important. Once I figured out what I was doing wrong and the trick to it, I bolted it all in 15m. But let me explain in (painful) detail what the problem was and how I solved it...

I extended the prop shaft to be in contact with both ends and placed a bolt in each end to hold it in place. The problem was that I couldn't fit a tool in there to bolt it, had to do it with just my fingertips. And then, the bolt head would clash with the universal joints parts and would not rotate or not even go straight. So it seemed some wouldn't go in because they didn't align...

The trick I wish I knew or had found in less than 2 hours... I put one bolt on a hole and, with the shaft away from the reverse box, bolted it just a bit. repeated with all other bolts. As the bolt head was away from the UJ, I could use a spanner. And as I tightened just a bit of each bolt and went around, the shaft got closer and closer. Near the end I placed some Pattex Nural 50 (equivalent to Loctite) on the bolt threads and fastened them until they were completely home. Bolts also had a kind of a colar that prevents them from unfastening with trepidation, but I sleep better putting some Nural in them.
The longer rear shaft is still just tied to the car, will have to wait for next weekend...

Sunday, January 30, 2011

Suspension All Around and Front Uprights

On the 17th October 2010 I stated that two smaller bolts that were aside on my bolt/nut/washer bag were clearly aside to go on the rear lower wishbones, I was wrong. Those two bolts should hold the upper front shocks. So, I started the day by swapping the bolts on the rear for regular ones. Since I was fiddling with the rear, I slided a washer between the shock and the bracket both on top and bellow because there was some space between it.

With those recovered bolts in hand, I bolted the front shocks to the car. When I was doing the first one, I noticed that the bag contained a nut smaller than the others. Hunted around all wishbones and found a second one. Swapped it for a regular and used the short nuts with the short bolts. It was a quick job to get the shocks in, also with a washer inside the bracket to make a tighter fit. When fitting the shocks, I always took care to put the damp adjusting button to the inside of the car, as suggested by Steve.
Next I went for the rear left side I had left undone past Tuesday. It was also reasonably fast. I think I got the hang of putting the uprights in. I smeared the long bar with lithium grease before sliding it on the lower part and started with the side that has the rose joint.
Went back to the front side of the car and grabbed the track rod ends and the uprights. Steve had labeled the uprights with "L/H" and "R/H", which made my job a lot easier. It was a simple assembly and got done quickly.
I then unpacked the break calipers and pads to look at them. One of my next possible tasks is to assemble front breaks and wheel flanges so I need to see how the parts look like and then go read the Sierra Haynes book or the web (since I have front Cortina uprights and brakes might be different).
Since I was unpacking, I looked around to see how the switches, ignition and start button looked like.
All in all, a great morning on the car!

Tuesday, January 25, 2011

Rear Right Suspension

Went before bed for some car time. Started by applying the 2nd coat on the ally panel for the passenger footwell. That one is done and ready to go on the car.

Then I removed all the bolts from the rear wishbones, applied some lithium grease and fitted them again.

Next, grabbed the rear shocks and the hub/flange/joint assembly and started to put it all together. Managed to do the rear right wheel, but then it was way over bed time. Both pictures are from the right rear done (minus tightening nylocs) taken from different angles.
Next is the left rear side and then the front ones! Maybe Thursday night...

(2017-04-14 - Me from the future comes here and says that I've made a big mistake... The direction the bolts go in makes a huge difference. On the right side, the lower bolt that holds the suspension on the lower arm has the head pointing to the wheel centre/hub. This means it is blocked. I would have to take the wheel out and disassemble the hub to be able to replace the suspension. Or angle-grind the bolt's head, take it out towards the rear and putting in a new bolt...
Noticed this because I suspect the rear left shock has failed and replaced it. Was going to replace the right one too, to have them with the same age/effort, but this error made it be such a pain I'll just skip it until I have no other chance.)

Sunday, January 23, 2011

Many Small Tasks

Had more car time this weekend than usual, although I didn't spend it all on the car. And not all went well, but it was a great weekend anyway!

Saturday drove around with tires and wheels on the car to get the tires fitted. Took the kid with me as he is growing a love for repair shops, tools and the likes. We got too much traffic going to the shop I wanted, tried another that refused to fit tires not bought there and the 3rd we went to was already closed for lunch. So, tires still to be fitted, I hope I have more luck next weekend. Was going to take care of it on Sunday but the shop I wanted to go to closed at 13h00, although the website says 20h00...

Sunday had some time in the early morning. Assembled the coils on the shocks and got them ready to go on the car!
Then hammered the wheel studs on the rear flanges. It took so much effort to pull them in that I don't know if I would ever had enough strength to get them into place with the nut and spanner. Then I assembled the flanges and c/v inner joints on the uprights and the rear part is also ready to go on the car!
I then grabbed the scrubby bit for the driller and scrubbed the rust away from the steering column. Also cleaned it and got it ready for a lick (or better, a spray) of paint. Did it together with the 2nd coat on the ally panel for the passenger footwell. The column is good enough with just one coat and so is ready to go on the car. The panel requires a 2nd coat on the other side and then it's ready to go on the car too!
Went around unpacking disk brakes just to look at them and looked at parts I'll be using soon.

In the evening had some more car time. But controlled my urge to go fit parts on the car and did something I had been postponing for too long. When the car came, I saved the wood floor from the crate, to be cut for firewood. I stored it on the hall of the storage rooms, but it's an area shared with neighbours. I had a circular saw but got afraid to use it so the crate floor was still there, after 6 months... Last weekend I bought a jigsaw and 65mm wood blade and aluminium blade. The idea was to use it to cut the crate floor and also several openings on the ally panels (throttle pedal, manifold, hand brake, etc). I have to say it was a wonderful buy. It didn't look like it was going to chop a part of me off and in 2 hours I had the crate floor in bits. Some are still too big for the fireplace but I'll chop them later. Important is that the crate floor is no longer on the shared area!

Since my next tasks on the car don't require using power tools and will not cause noise, I'm hoping to work a bit one of these nights again!

Thursday, January 20, 2011

Shocks Solved

Just a small update on this issue... Dumb me, that unpacked one coil and one shock instead of unpacking the four and looking with attention to them. There are two short shocks and two long shocks. And there are two short springs and two long springs. And I was trying to put the long spring on the short shock... Found this out when I unpacked them all because the wife was ready to help out.

I just assembled one and then left the other three to assemble when I get car time again (on the weekend).

Anyway, and for future reference, I would need a pair of "coil compressors" (compressor de molas). Knowing that, I looked online and they can be bought locally for around 25€, so it wouldn't be a problem.