Sunday, June 19, 2011

Beginning the Pipework

Started by doing other small jobs like bolting down the steering column and trying to figure out how the wing stays bolt on the hubs to see about putting the last pieces of copper pipe for the break circuit. Also some tidy up on the storage room.


During the week a friend that is also building an Aries Locoblade offered me detailed instructions (with pictures) on how to connect the pipes. Printed them out and took the needed parts and papers with me to the car. Then, with instructions at hand and looking at the labels done by Steve, made my first steps with the pipes.

First one was a small that was labeled by Steve as "Water hose - Header tank to water pump Y piece". And based on Iains' instructions, tried to fix the hose. It is such a tight fit on the Y piece that I ended up hurting my finger and not being able to put it to the end. Left it for later.
Then I grabbed the piece that had a T section. The smaller piece was labeled by Steve "Water hose to thermostat housing". Based on Iains' photos and instructions I identified what was the thermostat housing and fitted the pipe (with some resistance). Bolted the brace to hold it in place.
Grabbed the small larger pipe labeled "Thermostat to radiator via temperature sensor (remote)" and got it in place on the thermostat.
Then the longer large pipe labeled "Y piece from water pump to radiator lower", that was easy to get on the Y piece. Also braced in place.

Spend some more time forcing the smaller pipe on the Y piece, with no success. I'm sure I can't use lithium grease there, but sure there must be an easier way!

Didn't connect the smaller pipes to the header tank because I still don't have the bulkhead in place to hold the header tank to. Was going to put the radiator in place but then understood that it hangs on the outside of some supports and not the inside. So, I didn't have any tools to hold it in place. Couldn't bolt it to the chassis because I need the nose cone to see where to fit it without fouling the bodywork. It will have to be done later. I'll also have to cut a bit of the top hose (that came with 4 instead of 2 braces) to fit the thermostat sensor (remote), for the radiator fan. It was a good start but there is lots more to be done.

A final note of thanks to Iain for his excellent help with today's task!

Sunday, June 12, 2011

Roll Bar Done

Two other builders told me they also had the problem with the nut not fitting because the hole was too near to the corner. Each one found his own solution to the problem. I'm not sure what I'll do but, for now, decided to finish off the remaining 9 bolts. So, spent some time with the driller and the 90º angle fixing the holes and then bolting down the roll bar. Spent over one hour trying to "make a hole" for the nut to fit in and move the bolt hole a bit to the inside, but ended up leaving that one bolt behind for now.

Moved to the bulkhead. Used the electric saw to cut the ally and also the driller to help "making corners". But it's looking butchered as I don't have enough precision with either tool. I guess I can't postpone any more buying a dremmel.

Anyway, decided to cut in a way that allows adjusting the steering column to it's maximum height. I think I also figured out how to cover the hole being cut so that I don't get fluids nor a cold draft from that area onto my legs. Pictures of this all will come after I get it all properly done.

With the roll bar on, the silhouette of the car (it's usually under a cover) looks completely different and it is odd to look at it now. But the build is definitely moving along! And with the 10 hours I put on it in these two days, I caught up a bit on due tasks. A special public thank you to the wife, that arranged things so that I could have all this time to myself and the car. <3

Saturday, June 11, 2011

Front Brake Calipers, Reading and Roll Bar

Went for nearly a month without touching the car. A small vacation to celebrate wedding anniversary, extra work, yearly tax form filling and studying for a "test" prevented me from working on it. Today, my wife offered me the hole day with the car. Since it was a "no-kid" day, I ended up sleeping late and making a long lunch with the wife, so not that many hours in overalls... But happy!

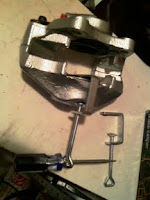
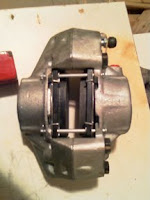
Spent some time trying to push the caliper pistons back so that they would fit. In the end, managed to do it with one of the holding tools I bought for ally panel time. The best of it was that I didn't even had to disassemble the caliper that I had previously done.
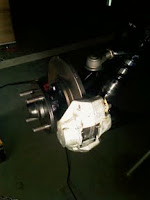
After assembling the second caliper, fitted them on the car. That included fitting a "crescent moon" shaped piece where the flexible brake pipe holds to. From there to the caliper, goes a rigid copper pipe. The purpose of these parts is to prevent the flexible pipe from fouling on moving parts, which would happen if it was to fit on the caliper directly. The pads move a bit on the pins and sometimes move to a point where they touch the disk when I'm rotating the wheel. Wonder if I did something wrong or if I'm missing something...
Placed the L-shaped ally panel on the car, fitted the upper steering column piece and then drew on the ally panel where to cut for the column to go through. Didn't get around to do the cutting, though, so I did not take any pictures of that.

Following task was with the Haynes CBR 900 Workshop Manual in hand, figuring out what was each part of the engine and where I should connect the water and fuel pipes. All pipes Steve sent were labeled stating were they should connect. I do know what is the radiator upper and lower but there were other things I didn't know. Also realized that what I thought was the throttle connection point is the choke. I didn't feel confident enough to fit the water pipes so postponed that task.

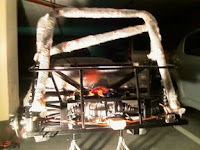
Time to fit the roll bar. Steve from Aries had told me that I should use some straps and a piece of wood to sprung the roll bar to the chassis and that this task was best done by two people. Initially I didn't understand what he meant but when I tried to fit the roll bar alone I got it. The wife came to the rescue and after a bit the roll bar was in place.
Spent some time drilling holes to place the bolts that hold the roll bar in place. Happily I used the good 8mmØ drill bit which made the task easy. Nonetheless, I managed to make holes slightly misaligned and one so close to a corner that I can't fit the nut inside... So next time I'll have to re-drill or enlarge (oval shape) a few holes to be able to finish the task. I'm not happy about it but I can't figure out what I did wrong this time to miss the drilling spots.