On the 17th October 2010 I stated that two smaller bolts that were aside on my bolt/nut/washer bag were clearly aside to go on the rear lower wishbones, I was wrong. Those two bolts should hold the upper front shocks. So, I started the day by swapping the bolts on the rear for regular ones. Since I was fiddling with the rear, I slided a washer between the shock and the bracket both on top and bellow because there was some space between it.
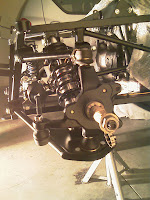
With those recovered bolts in hand, I bolted the front shocks to the car. When I was doing the first one, I noticed that the bag contained a nut smaller than the others. Hunted around all wishbones and found a second one. Swapped it for a regular and used the short nuts with the short bolts. It was a quick job to get the shocks in, also with a washer inside the bracket to make a tighter fit. When fitting the shocks, I always took care to put the damp adjusting button to the inside of the car, as suggested by Steve.
Next I went for the rear left side I had left undone past Tuesday. It was also reasonably fast. I think I got the hang of putting the uprights in. I smeared the long bar with lithium grease before sliding it on the lower part and started with the side that has the rose joint.
Went back to the front side of the car and grabbed the track rod ends and the uprights. Steve had labeled the uprights with "L/H" and "R/H", which made my job a lot easier. It was a simple assembly and got done quickly.
I then unpacked the break calipers and pads to look at them. One of my next possible tasks is to assemble front breaks and wheel flanges so I need to see how the parts look like and then go read the Sierra Haynes book or the web (since I have front Cortina uprights and brakes might be different).
Since I was unpacking, I looked around to see how the switches, ignition and start button looked like.
All in all, a great morning on the car!


No comments:
Post a Comment