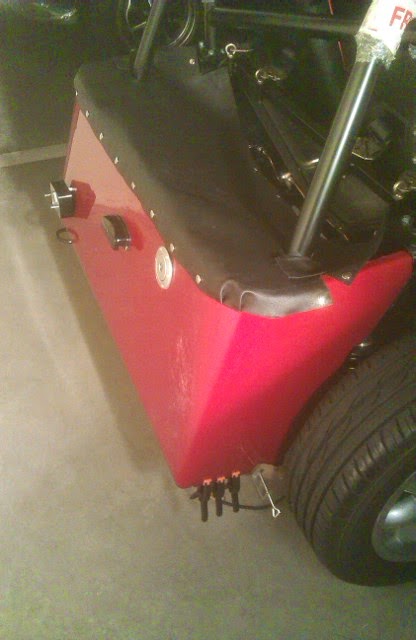
Small session working on the car. First task was to tie-wrap the extension wires I did last week to wire up the fog light on a LHD position. I had forgotten about holding the wires down and this got fixed.
Then spent some time trimming the rear wheel arches. After some looking into it, the trimming does make the arches fit a lot better. The picture below shows one arch trimmed and the other one yet to be trimmed so that the difference is visible.
I've heard that Steve at Aries now has new moulds for the rear arches that do not require trimming. This could be nice although this trimming is not hard and didn't take long.
Next time I'll have to make the holes for the lights and then fit them to the car. I still have the boot cover buttons to fit, but today I didn't feel like doing that.
Build diary for my first kit car: an Aries Locoblade (http://www.ariesmotorsport.com/) that I will be building in Portugal for the next months (or years).
Sunday, June 29, 2014
Sunday, June 22, 2014
More Work on the Rear
Another couple of hours on the car advanced the rear. No pictures because it's not quite visible.
Jacked the car up and riveted the rear panel to the chassis. Used 4 rivets under, two on the sides also under and two nearer the top against the chassis rail where the upper side of the coils fit.
Then used a bit of old wire and crimped an extension to the fog light wire. Connected it to the light pod and closed it. Just forgot to cable-tie the wire to the chassis, will have to do it next time.
Last job was to drill and fit the filler cap. This took a bit more work because the bolts were 4mm in diameter and I only had 3,5 and then a 4,75 drillbits. So I drilled with the 3,5mm and then used a file on the fiberglass to enlarge the holes to fit. Some time later, the fuel cap was in, bolted to the fiberglass and the ties on the hose also tightened.
Also removed the battery from the car and charged it in preparation for a drive soon.
Next session will be the buttons for the cover and then start on the rear wheel arches.
Jacked the car up and riveted the rear panel to the chassis. Used 4 rivets under, two on the sides also under and two nearer the top against the chassis rail where the upper side of the coils fit.
Then used a bit of old wire and crimped an extension to the fog light wire. Connected it to the light pod and closed it. Just forgot to cable-tie the wire to the chassis, will have to do it next time.
Last job was to drill and fit the filler cap. This took a bit more work because the bolts were 4mm in diameter and I only had 3,5 and then a 4,75 drillbits. So I drilled with the 3,5mm and then used a file on the fiberglass to enlarge the holes to fit. Some time later, the fuel cap was in, bolted to the fiberglass and the ties on the hose also tightened.
Also removed the battery from the car and charged it in preparation for a drive soon.
Next session will be the buttons for the cover and then start on the rear wheel arches.
Sunday, June 15, 2014
More Bodywork Done
Got to the car and something was niggling the back of my head. I still had the rear loom in one roll on top of the fuel tank. So, my first task was to lay out the wires and fix them in place with wraps, ensuring there would be no chaffing. Tried several layouts, specially because photos I saw had the loom between the rear panel and the fuel tank. In the end I opted for having the loom between the diff and the fuel tank. Now I just need to buy some more electrical wire to make an extension for the fog light wires to reach the fog light on a LHD position. Used one of the fuel tank bolts to attach the earth wires to the chassis.
After this, opened up the sikaflex and grabbed the front wings. It was a bit messy but not much of a story to it. Wings are wired, sikaflexed and bolted into place. I haven't tried the indicators to confirm all is well, need to recharge the battery, but at least it looks nice.
Then it was time for the rear panel. A lot of sikaflex around the top and bottom, to hold it in place. Left that to dry, will put the rivets underside next time.
Crimped the plate light wires, connected them and closed that light pod. Also put the filler cap in place, although it is not drilled and bolted to the panel yet.
Finally, fitted the boot cover just to see how it looked and where I would need to drill to install the buttons the cover attaches to. Not bad... Not bad at all...
Next session will be mostly drilling the rear panel to rivet underside, fit the filler cap and the boot. My driller's vacations are about to be over!
After this, opened up the sikaflex and grabbed the front wings. It was a bit messy but not much of a story to it. Wings are wired, sikaflexed and bolted into place. I haven't tried the indicators to confirm all is well, need to recharge the battery, but at least it looks nice.
Then it was time for the rear panel. A lot of sikaflex around the top and bottom, to hold it in place. Left that to dry, will put the rivets underside next time.
Crimped the plate light wires, connected them and closed that light pod. Also put the filler cap in place, although it is not drilled and bolted to the panel yet.
Finally, fitted the boot cover just to see how it looked and where I would need to drill to install the buttons the cover attaches to. Not bad... Not bad at all...
Next session will be mostly drilling the rear panel to rivet underside, fit the filler cap and the boot. My driller's vacations are about to be over!
Sunday, May 25, 2014
K.I.S.S. on the Rear
Often used and often forgotten acronym in IT is "K.I.S.S.": Keep It Simple (and) Stupid.
Grabbed a plastic sleeve used to fit bolts on walls and cut it to size. Got the size right at the third attempt. Bolts tightened and now I have the fog light in place, correctly angled, without more messing with aluminium scraps.
The session was small and most of the remaining time was spent looking at tasks ahead and trial fitting things. Trial fitted the rear wings. They fit quite OK (or I'm lowering standards as I get near the end). I could almost fit it straight away as is...
Then I unpacked the leather boot cover and looked into the buttons that I have to fix to the rear to button the cover to. They are held with rivets, so I'm not worried about having to look for yet another tool.
So, planning next tasks, by the correct order... 1) Open the sikaflex and fix front wings in place; 2) Fix rear with sikaflex; 3) Crimp loom wires, connect to rear lamps and close them; 4) Jack the car up and rivet the rear underside (as per instructions); 5) Drill rear for filler cap bolts; 6) Drill rear for boot cover buttons.
Grabbed a plastic sleeve used to fit bolts on walls and cut it to size. Got the size right at the third attempt. Bolts tightened and now I have the fog light in place, correctly angled, without more messing with aluminium scraps.
The session was small and most of the remaining time was spent looking at tasks ahead and trial fitting things. Trial fitted the rear wings. They fit quite OK (or I'm lowering standards as I get near the end). I could almost fit it straight away as is...
Then I unpacked the leather boot cover and looked into the buttons that I have to fix to the rear to button the cover to. They are held with rivets, so I'm not worried about having to look for yet another tool.
So, planning next tasks, by the correct order... 1) Open the sikaflex and fix front wings in place; 2) Fix rear with sikaflex; 3) Crimp loom wires, connect to rear lamps and close them; 4) Jack the car up and rivet the rear underside (as per instructions); 5) Drill rear for filler cap bolts; 6) Drill rear for boot cover buttons.
Sunday, May 11, 2014
Continuing with Rear of Car
Another session dedicated to the rear panel. Started with masking up to mark where plate and fog lights should go. Regarding the fog light, to run in Portugal it has to be on the left but for the UK's IVA it has to be on the right. I marked and drilled on both sides. After IVA I'll install a reversing light on the UK's holes. Using an old licence plate I had, tested how it would look.
After fitting the plate and fog lights, took the rear to the car and checked how the fog light had to be. The problem is that the rear has a slope and the fog light must be perpendicular to the road. So it has to take some wedge behind to make it stay in place. With a piece of scrap aluminium I made a part to go behind the light and that should do the job. Using the mobile phone with the inclinometer app, could check when the light was on the correct position. Unfortunately, the part I made was not a good fit, requires more work and I didn't have more time.
Still had time to look into the rear loom and check what connectors I need to add to the shop list.
After fitting the plate and fog lights, took the rear to the car and checked how the fog light had to be. The problem is that the rear has a slope and the fog light must be perpendicular to the road. So it has to take some wedge behind to make it stay in place. With a piece of scrap aluminium I made a part to go behind the light and that should do the job. Using the mobile phone with the inclinometer app, could check when the light was on the correct position. Unfortunately, the part I made was not a good fit, requires more work and I didn't have more time.
Still had time to look into the rear loom and check what connectors I need to add to the shop list.
Saturday, May 10, 2014
TO-DO List for Track
Time to get organised... A list of tasks needed to take the car to a track. And, where something is needed, what is so that I can organise a shopping spree (mostly ordering online from the UK due to differences in prices, I believe).
- Bleed brakes properly
Finish rear of carDrill for fog light on both sides and put it on the left for nowDrill for license plate light and fix itCrimp wires on loom for the needed fittingsSHOP LIST: 10 spades and 10 covered females (blue)Fit rear (sikaflex 221 arrived)Drill for and fit filler cap boltsDrill for and rivet boot cover buttonsPut on front wheels' cycle wings (sikaflex 221 arrived)Put on rear wheels' wingsTrim to fitDrill for stops and indicatorsFit to the carService the engineSHOP LIST: At least 3,5L of Oil - API grade SF or SG (SAE 10W40)SHOP LIST: Oil filter (i.e. HiFlo HF 303) - http://www.texoleo.com/SHOP LIST: Air filter (i.e. HiFlo HFA1901)SHOP LIST: Spark plugs (i.e. NGK CR9EH-9 or NGK CR9EHIX-9)SHOP LIST: Gap-filler toolSHOP LIST: Oil filter wrenchDo the serviceRe-tighten headlight bolts(this is an issue with having a shortened rack; wheels hit headlights on full lock...)- Re-tighten front wheel nuts
- May require taking wheels out, filing bent threads on studs and new nuts
Friday, May 2, 2014
Rear of the Car
Took a vacation day and spent some hours on the car. Main task was to work the rear fibreglass part.
Spent some hours trimming it to fit correctly on the car. Had to trim near the rollbar stays, to clear the shocks behind the wheels and for the tow hook to clear on the rear. It was time consuming so that it would look well, but it was worth it.
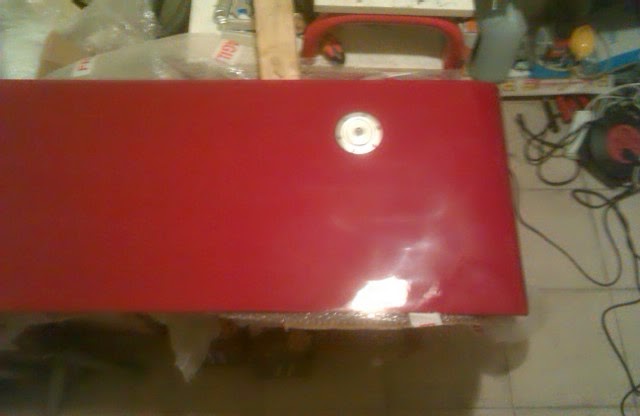
Then I marked where the fuel filled should go. Using the cork seal of the filler cap as template, marked the rear to be drilled. Using the circular cutting adapter on the drill, cut the circle. Since the tool is not precise, I left a bit of a margin. Spent some extra time with the sanding head on the dremmel triming it so that the filler cap would fit the hole. The final result is on the pictures below.
Then I looked into the other two things that must go on that part: fog light and license plate light. Regarding the fog light, this must be on the road side of the car. That means on the left side in Portugal but on the right side in the UK. Since I want to get the car road-legal in the UK, I need to comply with those rules. But I want to drive the car here with safety. I was wondering what to do and ended up sending an email to Steve at Aries. He replied saying the light had to be on the centre or the right but advising for me to put it on the right and later move it to the left and put the reversing light (that the car was not going to have) on the right, using the same holes. This sounds like a great idea, so it's what I'll be doing next time.
Spent some hours trimming it to fit correctly on the car. Had to trim near the rollbar stays, to clear the shocks behind the wheels and for the tow hook to clear on the rear. It was time consuming so that it would look well, but it was worth it.
Then I marked where the fuel filled should go. Using the cork seal of the filler cap as template, marked the rear to be drilled. Using the circular cutting adapter on the drill, cut the circle. Since the tool is not precise, I left a bit of a margin. Spent some extra time with the sanding head on the dremmel triming it so that the filler cap would fit the hole. The final result is on the pictures below.
Then I looked into the other two things that must go on that part: fog light and license plate light. Regarding the fog light, this must be on the road side of the car. That means on the left side in Portugal but on the right side in the UK. Since I want to get the car road-legal in the UK, I need to comply with those rules. But I want to drive the car here with safety. I was wondering what to do and ended up sending an email to Steve at Aries. He replied saying the light had to be on the centre or the right but advising for me to put it on the right and later move it to the left and put the reversing light (that the car was not going to have) on the right, using the same holes. This sounds like a great idea, so it's what I'll be doing next time.
Subscribe to:
Posts (Atom)